Timisoara a Digital Nomad paradise??

Now you have heard of Bucharest, of the most impressive castle in the country, and for sure you have heard about the myth and legend of Dracula, but have you ever heard about Timisoara? It is a small town in Romania one of the Balkan States in Central Europe bordering Croatia, Hungary, Serbia, Moldovia and Ukraine. [Sources: 7, 8]

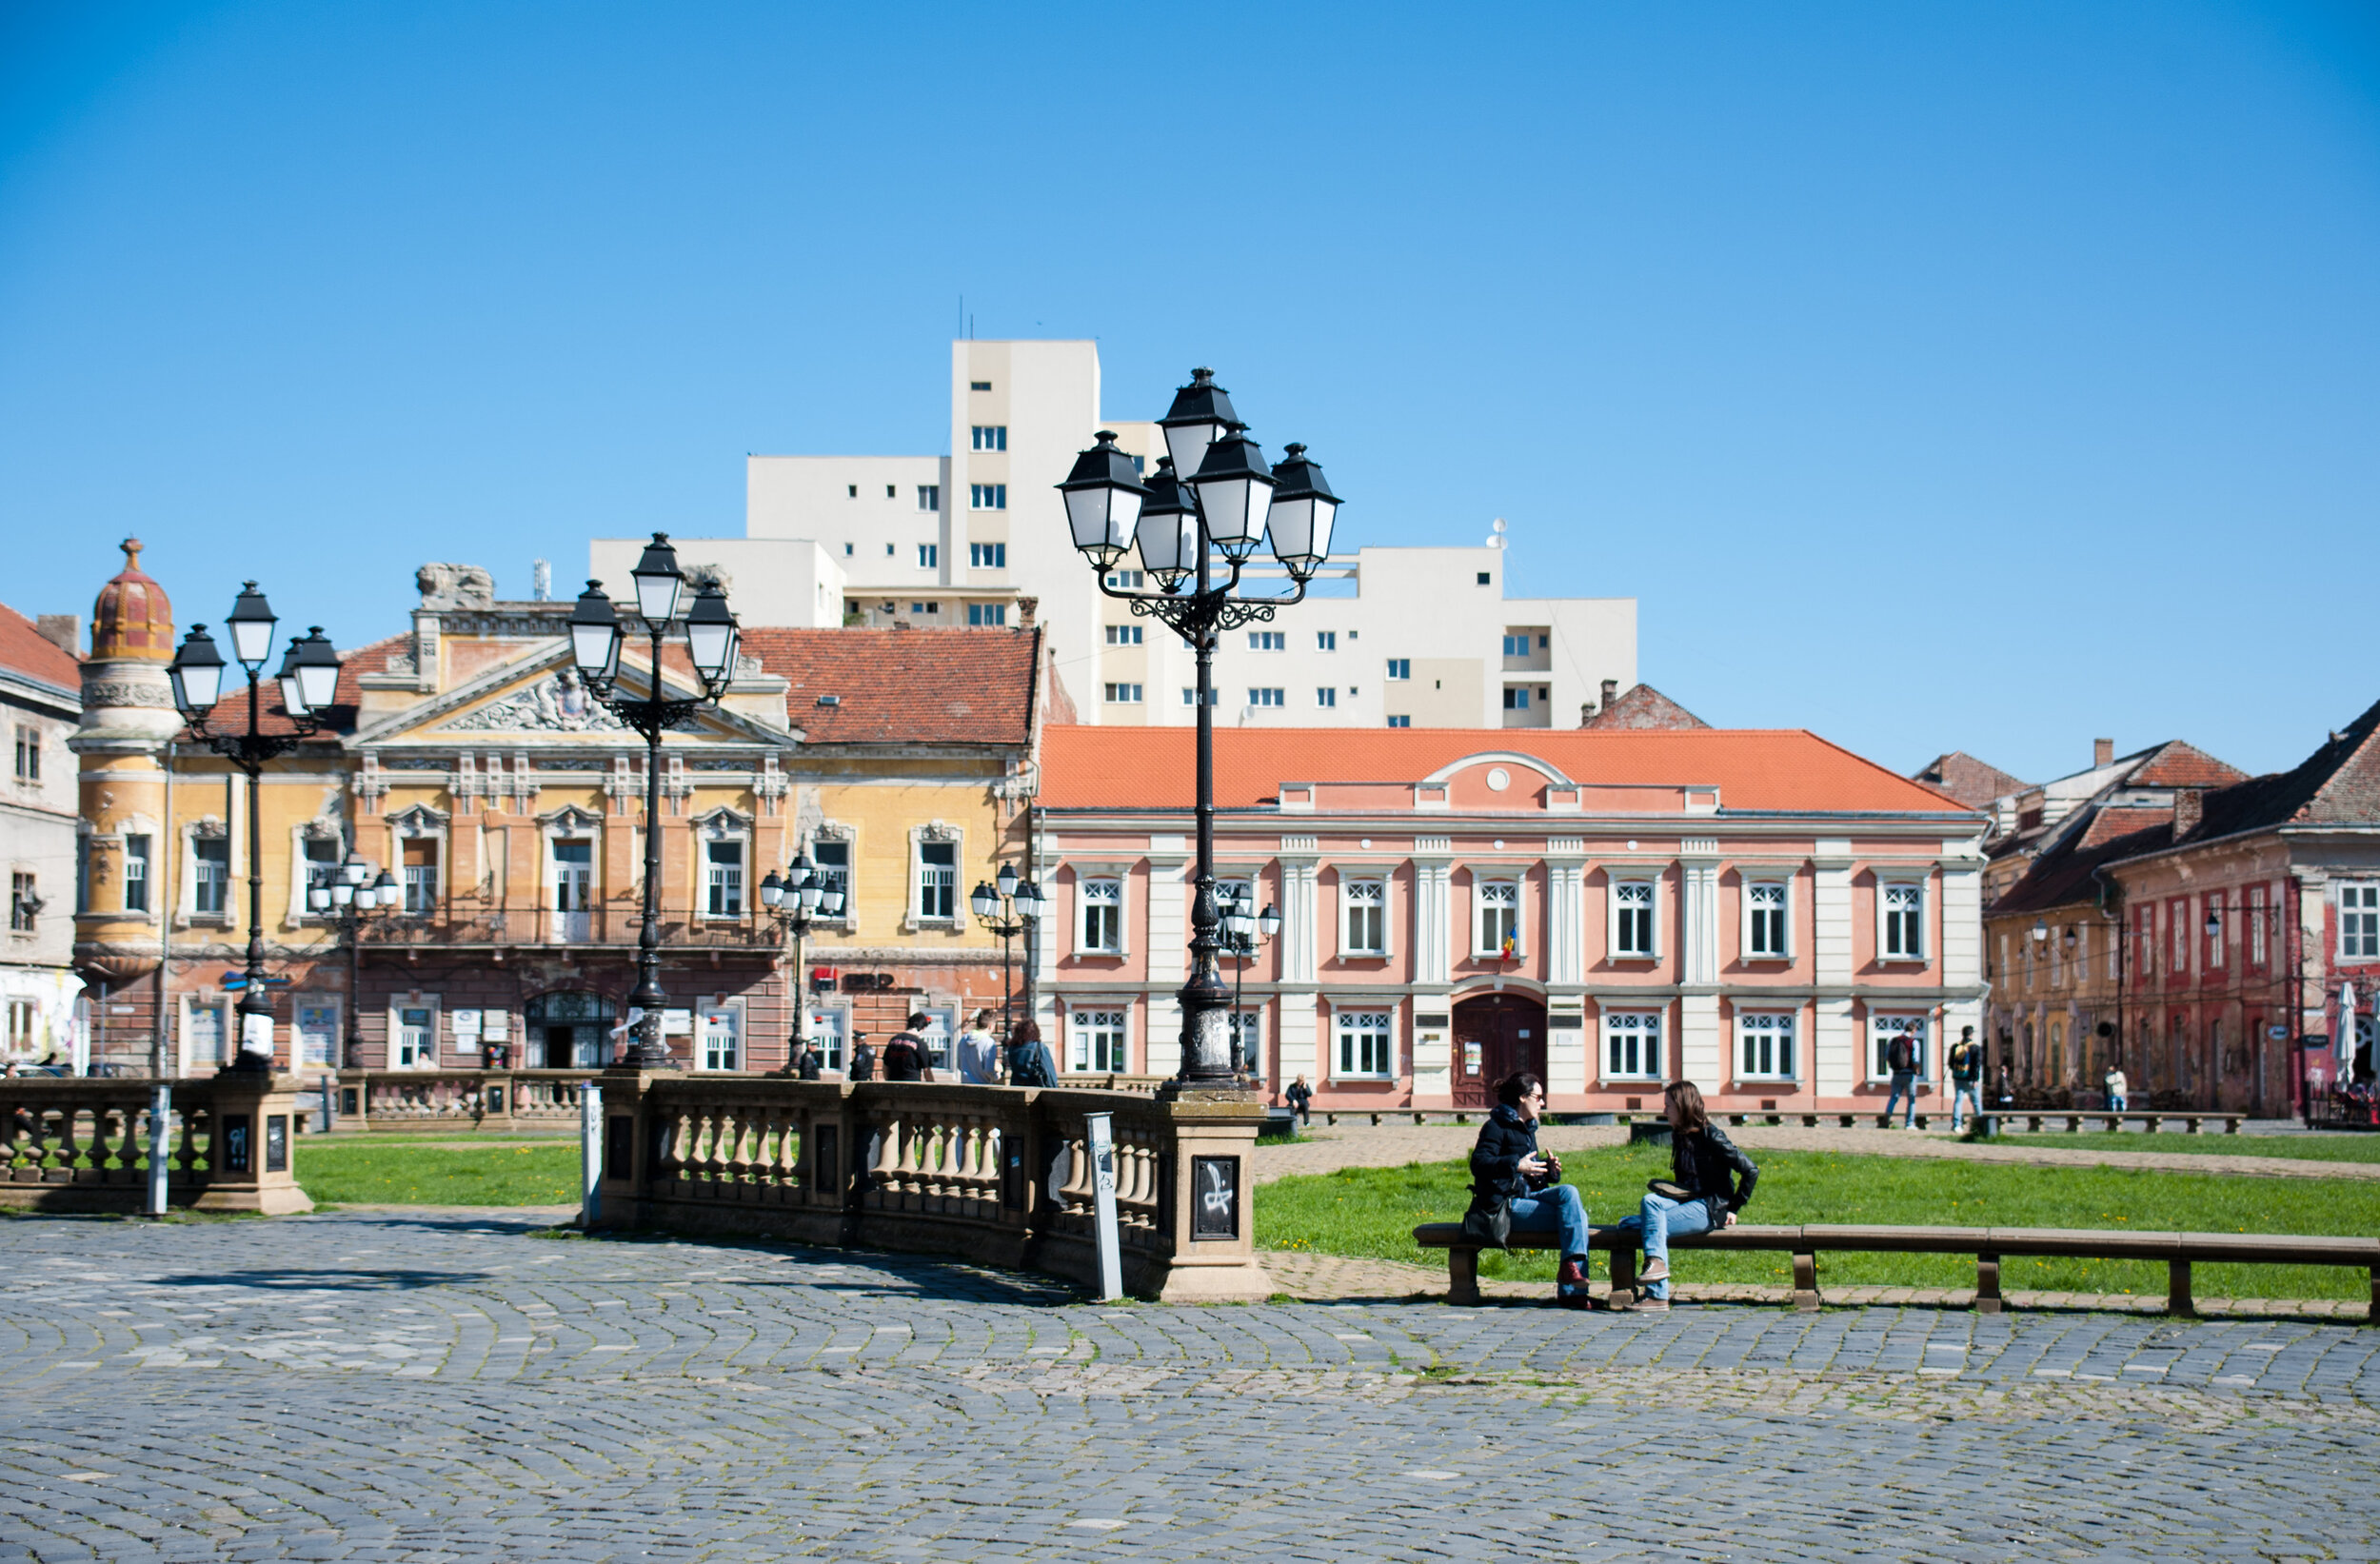
The origins of Timisoara date back to the Middle Ages, but the town has always played an important role in history due to its strategic position at a crossroads. Turks, Tatars, Austrians, Germans and Soviets have shaped the city by fusing different types of architecture. Over the decades, various other cultures of migration and conquest have ventured to this place, and there have been numerous events that show the rich heritage of the Timisoara period. Roman fortresses built around it and the ancient "Roman" fortress on which it was built. [Sources: 6, 7, 11]

Timisoara offers beautiful parks and botanical gardens, but there are many reasons to visit the city, not only because of the beauty of the city itself. In Timisoare there are also museums that can add history lovers to their program in Timiscoara. [Sources: 0]

If you are interested in history, you can take a day trip to Timisoara and visit the remains of some remarkable buildings. The entire historic centre of Timiscoara is full of attractions and beautiful after undergoing extensive restoration, with EU funds being used to preserve many of its historic buildings and monuments. [Sources: 1, 4]

Romania - 016.JPG

It is very close to Unirii Square and you will see the Romanian National Opera, which shares the same building. Next, cross the Carpathians to Transylvania and stop at Densus, where you will find one of the oldest Romanian churches. If you don't have a navigation system, you may have to stop in the city centre for a few minutes before you head to the next city. [Sources: 2, 4, 7]

Cafes are a big part of the trip, so it's important to find some of the most beautiful places in the area, and Timisoara is a delight. I know I would love to go back there to enjoy more time, but I am not going to do that. [Sources: 11]

Timisoara is a very cosmopolitan city, and if you ask and search for it, you can enjoy all kinds of activities, including a variety of restaurants, hotels, cafes, shops, restaurants and even a few museums. It is one of those cities that has a lot to offer and a great variety of food, entertainment, culture, art, music and more, so I can definitely make the most of it in one day. [Sources: 6, 9]

Romania - 018.JPG

In Timisoara you can learn about the Balkan state and the recent revolution during the day and enjoy the local atmosphere by chilling out in the rooftop bars and enjoying a few drinks in the evening. The nightlife here is anything but boring because the Romanians really know how to have fun. If you just enjoy the roofs and umbrellas, then you will go there for the night, but you will have to cross the Strada Alba Iulia 10 times and drive back to the city centre. In addition to all this, there is also a wide selection of restaurants, cafes, shops, restaurants and bars. [Sources: 0, 3, 5, 11]

This makes the different religions and cultures that live in Timisoara even more interesting, which makes it so unique and impressive. If you don't know much about the city or know many people who have visited it, you probably don't know what to do in Timisoare, but here are some of the reasons why you should enjoy this city. [Sources: 11]

Romania - 006.JPG


I have heard many times from people in Timisoara and Bucharest that this is the best country to live in and I could clearly see that people there like to live. What attracted me at the time was the fact that life in Romania is so much more affordable than in most countries to which one could have gone. Romania is not an expensive country and, being a good country to live in, you can live in such a city for less than half the cost of living in other countries. [Sources: 10, 11]

I think Timisoara could be the perfect place for a Digital Nomad Imagine, giving them the right to come and work from Rumania up to 6 or 9/12 months - regardless of their nationality under a special digital nomad visa,

I believe it would be a great opportunity for the city as well Many apartments that are empty outside the top season could find new tenants, that stay longer so create less work. The salaries and fees those digital nomads earn, it will be spent in Timisoara and in the country- resulting in a great boost of the economy through consumer spending!

Sources:

  • [0]: https://www.untoldwanderlust.com/reasons-to-visit-timisoara/

  • [1]: https://www.romanianfriend.com/attractions/timisoara-what-to-do-guide

  • [2]: http://romaniatourism.com/timisoara.html

  • [3]: https://www.lydiascapes.com/timisoara-boat-rides-walks-touch-nostalgia/

  • [4]: https://www.romanianfriend.com/tours/categories/timisoara-tours-day-trips

  • [5]: https://www.hostelworld.com/findabed.php/ChosenCity.Timisoara/ChosenCountry.Romania

  • [6]: https://www.alwayswanderlust.com/a-day-in-timisoara-romania-little-vienna/

  • [7]: https://www.caliglobetrotter.com/timisoara-the-little-vienna-of-eastern-europe/

  • [8]: https://jbat.lbi.org/locality/timisoara

  • [9]: https://wikitravel.org/en/Timi%C5%9Foara

  • [10]: https://erasmusu.com/en/erasmus-timisoara/erasmus-experiences/carlottas-erasmus-experience-in-timisoara-romania-559072

  • [11]: https://www.mywanderlust.pl/visit-timisoara-romania/

  • [12]: https://www.aviontourism.com/en/destinations/timisoara-1023

Today I minted the very first photograph

UPDATE 31.01.22

I have been active on NFT for more than a year and my main collections are here https://foundation.app/@marcosecchi

———

Finally today I minted my very first NFTs at OpenSea. It is a newly created photograph called “DropsOnFlower” and you can find it here.

DropsOnFlower-1615892826170.jpg

These are the reasons behind this decision.

First I believe in Innovation and there is no reason not to try, second I like to challenge myself and to understand what is behind and NFT and been a very interesting couple of weeks!

Then there are the following more complex reasons….

The cryptocurrency world has been making headlines recently, with Bitcoin hitting a new record high, and last week I sold proof — for — of ownership of Blockchain Ethereum. [Sources: 15, 18]

The graphic designer Mike Winkelmann, better known in the online art world as Beeple, has created a work of art called “Everyday First 5,000 Days.” The artwork, entitled “daily first 5000 days,” is a collage of over 5,000 images created by Beepsle. All collages known as Everyday First 5000 days are fully digital, and the artwork is entitled Everyday First 5000 days. [Sources: 0, 15, 18] Christie’s is auctioning “Everyday, First 5000 Days”

It consists of 5,000 individual images taken daily between 2007 and 2021 and posted to the artist’s Instagram. The work is a collage of over 5000 futuristic images that Winkelmann, 39, may have created during his time as a graphic artist and graphic designer. [Sources: 19, 21]

In an Instagram post , Winkelmann said the work being auctioned by Christie’s was coined as NFT by MakersPlace, a digital creation platform, and verified on the blockchain. He said: “When you create an NFT, it is placed on a blockchain, it is stamped every time and therefore makes it impossible to identify digital property, even if there is no physical copy of the piece. [Sources: 4, 21]

The process of turning a work into an NFT is known as embossing, which refers to the creation of a new token on the blockchain that ties in with the content forever. In this ever-growing series of blocks that are constantly being created to represent new transactions, you are writing off your ownership of the N FT. [Sources: 1, 20]

I first explored the potential of this new asset long ago when I heard of Meni Rosenfeld that wrote an essay entitled “An overview of coloured coins. The nude portrait generated by AI, an image generated by AI that was originally purchased three years ago for $0.46 in Ethereum ($176) and sold for over $100 ($112,717) this year. [Sources: 3, 14]

NFTs became technically possible when the Ethereum blockchain added support for them as part of a new standard. ERC-721 was created to create rules on how non-fungible tokens work on the blockchain of Ethereum. This crypto spirit continues today, as Gramatik, the world’s first and most popular cryptocurrency mining platform, has released its first NFT called Vitalik Buren. In their first official N FT case, they have made the name available to the public for the first time in Ethereum’s history. [Sources: 2, 7, 12]

By comparison, according to a report by DappRadar, the first NFT collection built on a blockchain took three years to reach a sale price of more than $100,000. Many N-FTs are selling for unprecedented amounts — $90 million was sold in February alone. Beeple, which was described as a “1-to-1” piece in its first 5,000 days, is one of many NFTs that sold for around $1,500 apiece, or $3,300 apiece, in just a few months. In recent weeks, numerous Nft marketplaces have emerged that focus on digital art, with NiftyGateway, owned by the Winklevoss Twins, and SuperRare leading the way not to mention OpenSea that is the largest. [Sources: 9, 15, 17]

Many believe that the first — ever NFTs are connected to an Ethereum — based game called CryptoKitties, which came to market in late 2017. Canadian company Dapper Labs released a new version in 2017, in which players could buy and trade one of a kind of animated cat. Beeple, a dopey-looking cartoon cat created by them, debuted in February 2017 on NiftyGateway for a price of $1,500 apiece, or $3,300 apiece. [Sources: 0, 13, 22]

CryptKitties was introduced but has since switched to its own blockchain to make it easier for cryptocurrencies — newcomers — to access. The first NFTs created in 2017 are called “crypto-identities,” a set of unique identities that register on the blockchain, where people buy and collect. [Sources: 6, 8]

Created in 2016 by Trevor Andrew, the Gucci Ghost is heading to the Nifty Gateway, where unofficial “Gucci — printed” NFTs start at $2,500. The NBA’s top shots, pictured below, are also being auctioned off as N FTs, and the hype for 2021 comes from the cryptokick token, which is not yet widely available. [Sources: 10, 11]

Sources:

[0]: https://www.washingtonpost.com/technology/2021/03/12/nft-beeple-christies-blockchain/

[1]: https://www.kapwing.com/resources/how-to-create-and-sell-nft-crypto-art/

[2]: https://blog.komodoplatform.com/en/non-fungible-tokens/

[3]: https://medium.com/@Andrew.Steinwold/the-history-of-non-fungible-tokens-nfts-f362ca57ae10

[4]: https://www.livemint.com/money/personal-finance/your-guide-to-non-fungible-tokens-what-nfts-are-and-how-they-work-11614768696550.html

[5]: https://julianhosp.com/nfts-explained-in-detail-by-an-expert-stache/

[6]: https://decrypt.co/resources/non-fungible-tokens-nfts-explained-guide-learn-blockchain

[7]: https://www.theverge.com/22310188/nft-explainer-what-is-blockchain-crypto-art-faq

[8]: https://www.investvoyager.com/blog/nft-craze/

[9]: https://www.benzinga.com/money/how-to-buy-nfts/

[10]: https://sixfiguresneakerhead.com/nft-crypto-sneakers-hype-sneaker-collecting/

[11]: https://jingdaily.com/digital-art-nft-luxury-fewocious-rtfkt/

[12]: https://thissongissick.com/post/what-are-nfts-and-crypto-art/

[13]: https://www.techradar.com/news/nfts-are-seriously-hot-right-now-but-were-falling-into-a-familiar-trap

[14]: https://ocula.com/magazine/art-news/nifty-gateway-made-nfts-sexy-not-sustainable/

[15]: https://forkast.news/nft-art-nba-top-shot-crypto-collectibles/

[16]: https://www.linkedin.com/pulse/why-2021-year-non-fungible-tokens-nfts-ruben

[17]: https://tanay.substack.com/p/the-rise-of-nfts

[18]: https://moneyweek.com/investments/alternative-finance/bitcoin/602928/what-are-nfts-and-why-are-they-so-popular

[19]: https://hyperallergic.com/624053/nft-art-goes-viral-and-heads-to-auction-but-what-is-it/

[20]: https://newatlas.com/collectibles/what-are-nfts-non-fungible-tokens/

[21]: https://www.cnbc.com/2021/02/18/christies-to-auction-beeple-nft-art-and-will-accept-ether-as-payment.html

[22]: https://www.wired.com/story/nfts-boom-collectors-shell-out-crypto/

Poveglia: home of an abandoned 17th-century asylum, like you’ve never seen it before!

Discover the mesmerizing beauty of Poveglia, an island steeped in history and brimming with photographic opportunities. Join our exclusive photography workshop and embark on a journey that combines the art of capturing stunning images with the allure of this unique location.

Why Choose Our Poveglia Photography Workshop?

Our workshop stands out as a remarkable experience, offering you the chance to enhance your photography skills while immersing yourself in the captivating ambiance of Poveglia. Here's what sets us apart:

Expert Guidance: Benefit from the expertise of our professional photographers who will provide you with valuable insights, personalized instruction, and guidance throughout the workshop.

Unparalleled Island Location: Poveglia's rich history and picturesque landscapes provide an idyllic backdrop for your photographic exploration. From its crumbling ruins to its lush flora, every corner of this island offers a story waiting to be captured.

Hands-On Practice: Engage in hands-on photography sessions, allowing you to apply newly acquired techniques and experiment with different styles under the guidance of our instructors.

Unique Shooting Opportunities: Access exclusive shooting locations on Poveglia, including hidden spots rarely seen by visitors. Capture breathtaking images of the island's haunting beauty and preserve its essence through your lens

This small island located in the Venetian Lagoon, located between Venice and Lido is known for the dilapidated 17th-century asylum for the mentally ill. Tales of hauntings, ghostly moans, screams and spectres make this place known as one of the most haunted locations in the world. 

Poveglia  001.jpg

Complete with a plague burial ground, this site is deserted and off-limits, making images reasonably rare. 

Stranger yet is the local’s reaction to being asked questions about this foreboding place; very few Venetians talk about the island or answer questions. Many pretend the island doesn’t even exist, which only adds to the mystery, intrigue, and ultimate sadness of the location. 

Poveglia  022.jpg

I regularly organize photography workshops, especially the 10h Black and White that include a visit to Poveglia. Check with me about availability.

My photo zine of Poveglia is here https://www.amazon.com/gp/product/B08WJY7WNB Do check for your local Amazon Marketplace for free handling and shipping!

This black and white zine will bring the sense of dread of the island into your living room and pique your curiosity about all the secrets buried on Poveglia.


Sicilian " Pasta chi Vruoccoli Arriminati"

For pasta chi vruoccoli arriminati, it's the intentionally overcooked cauliflower that sets the dish apart. Not to be confused with broccoli, Sicily's "broccolo," or "vruocculu" in Palermo dialect, is what we know as cauliflower, and its peak season is in the fall. While most types of cauliflower will work for this recipe, light green varieties, like Romanesco, are ideal.

9b6de79e1f701077a1e19aa756e660ec.jpg

Pasta with cauliflower in red, the manner palermitana: creamy, with fried bread, pine nuts and raisins

Pasta with cauliflower in red Sicilian, one of the most traditional recipes of Sicilian cuisine winter. If we were on the island we would call it "pasta chi vruoccoli arriminati", or pasta with cauliflower mixed in a sauce made of onion, anchovies, pine nuts, raisins and tomato paste until it becomes almost a cream.

Now, I'm not a lover of pasta cooked in the oven because it's hard to keep cooking, then I condisco with toast but without firing. But if you want to prepare the classic timbale the manner Palermo, drain the pasta very al dente, conditela, place in a baking dish and sprinkle the surface with toasted bread, then cook for 10-15 minutes in the oven.

This is by far one of the Winter recipes I love the most: you can do it with any type of cauliflower, the White, violet, even the Roman. For the “pasta chi vruoccoli arriminati” in Sicily often they are using the bucatini, but I have a weakness for casarecce, then you choose what you prefer. Try it, you will see that goodness. Have a good day!

PORTIONS: 4

PREPARATION TIME: 15 minutes

COOKING TIME: 40 minutes

INGREDIENTS

  • 800 grams of cauliflower

  • 320 grams of pasta (casarecce, bucatini)

  • 50 grams of tomato paste (2 heaping tablespoons)

  • pine nuts and raisins, to taste

  • salt and pepper, to taste

  • extra virgin olive oil, to taste

  • 6 anchovy fillets in salt or oil

  • a small onion

  • Dop Sicilian pecorino grated cheese or seasoned, to taste

  • grated stale bread, to taste

  • Safffon

You start the process by trimming a head of cauliflower into florets and simmering them in salted water until they're tender enough to crush with a wooden spoon. You then add them to a skillet in which chopped onion has been gently cooked with anchovies in olive oil. Scoop some of the water you used to cook the cauliflower into the pan, along with the familiar cast of raisins, toasted pine nuts, and a pinch of saffron*, and bring everything to a simmer. At this stage, that cooking water is doing a lot of heavy lifting: it's helping to break down the cauliflower, plump the raisins, bloom the saffron, and soften the pine nuts.

And now it's "arriminare," or stirring, time.

As the sauce ingredients come to a simmer, get to work with a wooden spoon, stirring, smooshing, and swirling the florets, coaxing them to break down and thicken the liquid in the pan to take on a thick, saucy consistency. While that's happening, you cook the pasta until just shy of al dente in the same cauliflower-cooking water; short, tubular sedani or long bucatini are the shapes of choice. Finish the pasta in the skillet with the sauce, tossing a handful of breadcrumbs in at the last moment to give the sauce extra body, and then topping each serving with a final sprinkling for crunch. The nutty sweetness of the cauliflower plays off the pine nuts and raisins, the savoury anchovies do their thing in the background, and even though it's got close relatives in Palermo, one taste will tell you this is a vegetable pasta unlike any other.

Why It Works

Extended cooking and vigorous stirring make cauliflower break down into a hearty sauce.

Sicilian pantry staples—anchovies, raisins, pine nuts, saffron, and toasted breadcrumbs—strike a characteristic savoury-sweet balance with North African influence.

Tossing the pasta with toasted breadcrumbs helps to achieve the perfect noodle-coating sauce consistency, and a sprinkling of the same crumbs gives the finished pasta a crunchy topping.

Format : Showcase your best work with Online Portfolio

Format is one of my favourite online portfolio designed for creative minds by creative minds!
Give it a try and you will not be disappointed! it is a brilliant way to display your work, Click Here

format-portfolio.png

I like the ease with which it allows you to create websites as it gives you endless options to develop your creative side and unleash your imagination, you are the owner of your ideas and Format helps you make them come true. Another thing to note is that you don't need to have advanced programming knowledge since this system provides you with an intuitive environment so that you can create what you want with just a few clicks thanks to the graphic editor that integrates, the user just has to choose what they want to incorporate into its website and the software does the whole coding part for you.

Yesterday they really improved the total experience and functionality launching “WORKFLOW”

Screenshot 2021-03-04 at 08.52.08.png


Workflow integrates with your Portfolio website, so you can get the job done all in one place.

Streamline collaboration with Client Galleries.

Workflow’s new suite of tools makes it even easier to organize and manage all of your client work.

Deliver photos effortlessly with File Transfers.

Share a branded download page with clients and leave a great impression.

Stay on top of all the details.

Organize and access client information in one place, including your contacts, project notes, file transfers and client galleries.

Keep your client list up-to-date.

Collect contact details and assign participants to projects. You can even create labels to categorize and sort your clients.


Showcase your best work with Online Portfolio and run your business like a pro with Workflow.
Click Here


*Disclosure: I only recommend products I would use myself and all opinions expressed here are our own. This post may contain affiliate links that at no additional cost to you, I may earn a small commission.


Showcase and Sell your Images with NFTs

Starting from today I will start minting my very first Non-Fungible Token. This is a token saved on the Ethereum blockchain, which is unique and can prove the ownership of a good or service. In this case, a photograph I took.

DSCF5035 copy.jpg

NFT (non-fungible token) technology empowers content creators such as photographers to control, manage, and distribute their content, and in addition, is a great platform to showcase, promote, and sell their images.

The introduction of NFT technology has begun to benefit the photography world. With regard to my point of view, photographers should be making use of cryptography and blockchain technology features that ensure their work cannot be replicated, and thus proof of authenticity is backed by math and code.

Photographers can mint ethereums (about 50 cents) on a blockchain that is interoperable with Ethereum. It is cheaper to make more coins at once.

SmartNFTs enables photographers to create one final NFT with multiple layers of NFTs, while also implementing various functions, such as lifetime royalties. Any future sales of the NFT, from one owner to another, would incur a royalty to the digital artist.


Screenshot 2021-02-28 at 20.32.35.png

NFT is getting more and more popular, and this time the Ethereum network, which has been upgraded since 2017, is better equipped to deal with the constant activity. NonFungible.com, a company that publishes market insights on NFTs, says that in 2020, the value of NFT trading was approximately $250 million, an increase of 300% from the previous year. People are paying high prices in both cryptocurrency and legal tender to purchase tokens that represent ownership of digital objects, which are then resold at a higher price.


NFTS the Basics

Italian Focaccia Recipe

If you are looking for an Italian Focaccia recipe with a soft, chewy texture with a high rise, this is the bread for you!

Pizza vs Focaccia

Focaccia is popular in Italy and is usually seasoned with olive oil, salt, sometimes herbs and may at times be topped with onion, Focaccia can be used as the bread to accompany a meal. The primary difference between conventional pizza and focaccia is that pizza dough uses very little leavening (baker’s yeast), resulting in a very thin, flat and flexible crust, while focaccia dough uses more leavening, causing the dough to rise significantly higher. The added leavening firms the crust and gives focaccia the capacity to absorb large amounts of olive oil.


Ingredients

500g strong bread flour, plus extra for dusting

7g dried fast action yeast

2 tsp fine sea salt

5 tbsp olive oil , plus extra for the tin and to serve

1 tsp flaky sea salt

¼ small bunch of rosemary , sprigs picked

Method

STEP 1

Tip the flour into a large mixing bowl. Mix the yeast into one side of the flour, and the fine salt into the other side. Then mix everything together, this initial seperation prevents the salt from killing the yeast.

STEP 2

Make a well in the middle of the flour and add 2 tbsp oil and 350-400ml lukewarm water, adding it gradually until you have a slightly sticky dough (you may not need all the water). Sprinkle the work surface with flour and tip the dough onto it, scraping around the sides of the bowl. Knead for 5-10 mins until your dough is soft and less sticky. Put the dough into a clean bowl, cover with a tea towel and leave to prove for 1 hr until doubled in size.

STEP 3

Oil a rectangle, shallow tin (25 x 35cm). Tip the dough onto the work surface, then stretch it to fill the tin. Cover with a tea towel and leave to prove for another 35-45 mins.

STEP 4

Heat the oven to 220C/200C fan/gas 7. Press your fingers into the dough to make dimples. Mix together 1½ tbsp olive oil, 1 tbsp water and the flaky salt and drizzle over the bread. Push sprigs of rosemary into the dimples in the dough.

STEP 5

Bake for 20 mins until golden. Whilst the bread is still hot, drizzle over 1-2 tbsp olive oil. Cut into squares and serve warm or cold with extra olive oil, if you like.

Fifteen Tips For Better Photography

Would you like to improve your photographic skills just that little bit more? Tired of shooting the same old photos from the same angle and the same subject every time? Here are fifteen cherished tips you can use to improve your photography.


Keep an eye on the weather

Weather conditions can play a big part in setting the mood of your shot. Rather than waiting for the bright light of the midday sun, a misty morning in a forest can be the perfect time of day for that mood-shot.

Take your time to choose the subject

Take your time to choose the subject, then spend time walking around the subject looking for the best angle and lighting.

Take your time to set up the shot

Don't be afraid to take your time to set up your shot. Although it can get a bit frustrating if you have your loved ones tagging along and they're sitting and waiting impatiently for 20 minutes for you to take a single shot of a piece of driftwood on the beach!

Don't always choose brightly-coloured subjects

Subjects with muted colours can sometimes produce excellent results. A field of wheat of similar yellow-brown colour can produce striking results when accompanied by a low-sun and long shadows.

Movement diffusion

If you have a camera that allows you to shoot with a manual shutter speed - try slowing the speed and increasing the F-stop. Then move your camera when taking the shot. Some very effective arty-type images can be produced with blur effects.

Overexpose your subject

Not too good to do all the time, but experiment with results by over-exposing the subject.

Try macro photography

Grab a magnifying glass and see if you can focus your camera through the glass onto a small subject. It just may work! And may open up a whole new range of subjects for you!

Shoot through wet glass

Try spraying water onto a window, then take a shot through the window to a subject outside. (wet the outside of the window - not the inside of your home!)

Colour balance

Try balancing colour by having the subject and the surrounding detail in similar colours.

Silhouettes

Silhouettes usually have a small range of colours, but can produce some of the most beautiful images. Shooting a silhouette involves having the background brighter then the subject in the foreground.

Experiment with patterns

We've all seen those amazing images of the red and orange leaves of maple trees in the fall/autumn. Thousands of leaves - all of a similar shape and colour - but very awe-inspiring and beautiful.

Compliment colours

Two strikingly-different colours can be beautiful too. Picture an image of your girlfriend or wife in a red dress sitting on a field of green grass. Or your boyfriend or husband in a red shirt walking through a field of waist-high wheat stalks. Complimentary colours that will bring more attention to the subject.

Use a colour filter

If your camera can be fitted with coloured filters - try your hand. Although this effect can be made quite easily these days with a photo and image-editing software.

Sunrise is better than sunset

Wake up before sunrise one day and go on a photography expedition. If you've not done it before you'll be pleasantly surprised by the contrasting light and shadows. But remember you'll only have a very short window of time in which to shoot (usually less than an hour) before the sun rises too high and you lose the light.

Use a flash in daylight

Use your flash during the daytime to fill a close subject with light. This will produce better results where the background is brighter than your subject, and the automatic shutter speed on your camera shoots too fast to show the detail of your subject effectively.

For more detailed instructions “Learn Digital Photography: The Ultimate Guide for Beginners” check here

Your perfect Italian pizza recipe is here

Making pizza at home is actually simpler than you might expect. The secret to great pizza is fresh high-quality ingredients that make a fantastic homemade dough, and sauce and toppings that are made from scratch with fresh ingredients as well.

homemade-pizza

Makes dough for 2 pizzas, each one about 12 inches in diameter:

300 mL of warm water

500 grams flour, type “00”*

10-12 grams of fresh yeast or 3 or 4 grams of dried yeast.

3 tablespoons of extra virgin olive oil

1/2 teaspoons salt

1 teaspoon sugar

*A note on the flour: In Italy, “00”, or “doppio zero,” flour is the most highly-refined and finest-ground flour available. Not available where you are (or too expensive?). An all-purpose flour should work just as well!

INSTRUCTIONS

To prepare the dough for the pizza, start pouring the flour into a large mixer bowl.

  • In a small bowl add luke-warm water and then add the yeast, mixing gently until the yeast is dissolved.

  • Turn the mixer on with the hook mounted on medium-to-low speed and start pouring the water little by little, making sure you wait for the previous dose to be absorbed by the flour.

  • Keep kneading until the dough gets smooth and homogeneous. When it gets to that point, keep kneading for about 15/20 minutes.

  • Add the salt and keep the mixer running until the salt is fully combined with the dough.

  • When the salt is fully absorbed, remove the dough from the mixer and knead with your hands until you get a large ball.

  • Place it in a large bowl, cover with foil or a clean humid cloth, then let it rise in the oven with the light on.

  • Wait until the mixture has at least doubled in volume (after 1.5 h). Ideally, you should let it triple in size (at least 3 hours).

  • Once the dough has risen, transfer it on a work surface.

  • Divide it into 2 equal parts and shape them as balls using your hands. Once done, cover them with a clean cloth and let them stand for 30 minutes at room temperature, before using them to make your pizzas.

Preheat Oven and Pizza Stone: Place the pizza stone on the center (or top third) rack of your oven, and preheat the oven and pizza stone to 250 C 550 degrees Fahrenheit (for at least 30-45 minutes). If your oven does not go up to 250C or 550 F degrees, heat it to the absolute maximum temperature that it can go. If it can heat to higher than 250C or 550 F degrees Fahrenheit, even better!

Assemble the Pizza: Sprinkle the pizza peel (alternatively, you can use the back of a baking sheet – but it will be harder!) with a tablespoon of semolina. Gently stretch one ball of pizza dough into roughly a 12-inch circle (don’t worry if it’s not perfectly uniform). If the dough springs back or is too elastic, allow it to rest for an additional five minutes. The edges of the dough can be slightly thicker, but make sure the centre of the dough is thin (you should be able to see some light through it if you held it up). Gently transfer the dough onto the semolina-dusted pizza peel or baking sheet.

Cover with your favourite sauce and toppings!! Tomato Sauce and Mozzarella Cheese are in my view a must. My fav is Ham and Pineapple, then apparently these are the Top 10 Toppings!

  • Pepperoni.

  • Mushrooms.

  • Onions.

  • Sausage.

  • Bacon.

  • Extra cheese.

  • Black olives.

  • Green peppers.

Enjoy!

Black and White Digital Photography. First Steps

There are several ways to achieve black and white digital photography. With black and white digital photography, you are bringing the end-user back into a period of time when life seemed a lot simpler. Many digital cameras come equipped with a function to take these types of photos. If your digital camera does not support this function, you can still change your photographs into black and white with software programs.

As we all know, there are times in our lives when the priority is to shoot black and white images. That happens to me a lot. I want to get rid of colour to accentuate shapes or just because it is aesthetically pleasing. Black and White photography is not necessarily simpler than colour photography, but it offers a whole different set of challenges and possibilities.

DSCF8846 copy.jpg

There are several ways to achieve black and white digital photography. With black and white digital photography, you are bringing the end-user back into a period of time when life seemed a lot simpler. Many digital cameras come equipped with a function to take these types of photos. If your digital camera does not support this function, you can still change your photographs into black and white with software programs. Some camera shot only in Black and White!

You will want your black and white digital photography to look its best when you are finished. A technique that can help you get the best image out of your digital photograph is through image manipulation. You may find it better to convert your eight-bit colour images (which are usually jpegs) into 16-bit colours first. This is important because an 8-bit RGB can be the same as a 10-bit grayscale.

You can find information all over the Internet to help you with your black and white digital photography. These resources can be found in everything from websites to magazines. Coloured pictures can look truly beautiful as a black and white display. You will usually have to convert your graphics because although there are options with digital cameras, there are no true black and white digital cameras.

My favourite app/program is Silver Efex Pro, that creates extraordinary photos using unique black & white algorithms and adjustments inspired by darkroom techniques. Change luminosity and contrast, brighten whites, apply colour filters, and even adjust density and grain!


DSCF1066 copy.jpg

TIP!!! Correct the Colorcasts

An important part of black and white digital photography is correcting the colorcasts. These are caused by bad lighting, but you can use software such as PhotoShop Elements to make the relevant changes by using their editing applications. The Imaging Factory is also software that can help you to easily convert and fix lighting areas in your graphics to get the best look with your black and white digital photography. If you want to turn your graphics into black and white digital photography, you can step into a completely new dimension in photography. You can do an endless array of projects right from your own computer.

5 Beginner Tips For Shooting Winter Landscapes

Winter brings out the toughest elements in our climate, with many people putting away their camera bags ëtill early spring. But, if you do put away your camera you are missing out on the raw beauty that this magical season brings.

Here are a few tips to make the trip more enjoyable.

1. Wear the right clothes: Itís very important to wrap up warm when out and shooting winter images. The winter season brings the toughest elements, so if you are planning to spend a few days out and about always be well prepared.

2. Watch the weather: Itís very important to know what the weather is going to be like. You donít want to travel for a couple of hours and then hear a weather report that tells you that: the weather is wet for the next few days. During the winter months the weather can dramatically change in a matter of hours.

It ís always advisable to let someone know where you are going and which route youíre planning to take. If you do get injured or ever caught in a storm someone may be able to help.

Snow.jpg


3. Carry only what you need: Carry only the essentials. You donít need to upload your camera bag with every piece of equipment you own. If you are going to be out taking pictures all day you are much better off going as light as possible. Carrying a light load will also help preserve energy. You could be climbing icy rocks or crossing snow filled hills; a warm flask would serve you a lot better than a third camera.

4. Look for detail: Snow, ice and frost bring out texture and atmosphere in most subjects. The early frosty morning is an ideal time for close-up photography. The frosty morning also brings out patterns in our landscapes.

Take care where you place your camera: if you are taking pictures early in the morning try placing it at oblique angles to the sun - this will give your images strong shadows. This will also add mood to your landscape images. Once you have found the perfect spot pay extra attention to foreground interest as this will add depth to your image.

Snow in Venice14.jpg


5. Expose carefully: Snow and ice are extremely difficult to expose properly. Snow usually confuses your cameras metering system or your hand held light meter. When you take a light reading from snow you will automatically get an underexposed image. The meter will record the snow as grey.

Now is the time to start bracketing your shots. If you bracket your shots add 1 - 2 stops of light to compensate for your light meter reading. Using an 18% grey card, which I described in a previous article, should also give you a perfect light reading.

Snow in Venice04.jpg

Tiramisu: Real Italian Recipe

Here's Tiramisu authentic Italian recipe. This is the most famous Italian dessert in the world and it's from Treviso (a lovely town near Venice). It's delicious, easy to make, and I'm sure that you'll love it!

the origin of tiramisu date its invention to the 1960s in the region of Veneto, Italy, at the restaurant "Le Beccherie" in Treviso. Specifically, the dish is claimed to have first been created by a confectioner named Roberto Linguanotto, owner of "Le Beccherie".

The original shape of the cake is round, although the shape of the biscuits also allows the use of a rectangular or square pan. However, it is often assembled in round glasses, which show the various layers, or pyramid.

Numerous variations of Tiramisu exist. Some cooks use other cakes or sweet, yeasted bread, such as panettone, in place of ladyfingers (savoiardi). Bakers living in different Italian regions often debate the use and structural qualities of utilising other types of cookies, such as pavesini for instance, in the recipe. Other cheese mixtures are used as well, some containing raw eggs, and others containing no eggs at all.

A slice of Tiramisu at the   “Beccherie” Restaurant in Treviso

A slice of Tiramisu at the “Beccherie” Restaurant in Treviso

Ingredients

SAVOIARDI LADYFINGERS ( I like Balocco)

500 g (1,1 lb) of mascarpone cheese cream

4 medium eggs

100 g (3,5 oz) of sugar

300 ml of coffee (better if proper espresso)

Cocoa powder

OPTIONAL 2 tablespoons MARSALA can be replaced by Rum, Sherry etc

Preparation

Using an electric mixer in a medium bowl, whip together egg yolks and 1/4 cup/50 grams sugar until very pale yellow and about tripled in volume. A slight ribbon should fall from the beaters (or whisk attachment) when lifted from the bowl. Transfer mixture to a large bowl, wiping out the medium bowl used to whip the yolks and set aside.

In the medium bowl, whip cream and remaining 1/4 cup/50 grams sugar until it creates soft-medium peaks. Add mascarpone and continue to whip until it creates a soft, spreadable mixture with medium peaks. Gently fold the mascarpone mixture into the sweetened egg yolks until combined.

Combine espresso in a shallow bowl and set aside.

Using a sifter, dust the bottom of a 2-quart baking dish (an 8x8-inch dish or a 9-inch round cake pan would also work here) with 1 tablespoon cocoa powder.

Working one at a time, quickly dip each ladyfinger into the espresso mixture -- they are quite porous and will fall apart if left in the liquid too long -- and place them rounded side up at the bottom of the baking dish. Repeat, using half the ladyfingers, until you’ve got an even layer, breaking the ladyfingers in half as needed to fill in any obvious gaps (a little space in between is O.K.). Spread half the mascarpone mixture onto the ladyfingers in one even layer. Repeat with remaining espresso-dipped ladyfingers and mascarpone mixture.

Dust top layer with remaining tablespoon of cocoa powder. Top with shaved or finely grated chocolate, if desired.

Cover with plastic wrap and let chill in the refrigerator for at least 4 hours (if you can wait 24 hours, all the better) before slicing or scooping to serve.

tiramisu-treviso.jpg

Business Tips for Photographers in 2021 1/3

I am fortunate enough that, despite the Covid crisis, my income has not changed and has actually increased in this crazy climate of 2020/21.

At the beginning of the crisis exactly 12 months ago, I thought I had to modify strategies and leave aside my extremely successful workshops/photo walks business  and commercial clients heavily linked to tourism and travel. They accounted for more than 200,000 Euro. So I sat down and decided to explore other areas and find different incomes

In 12 months I started three business ideas each of them became very profitable in less than 90 days

From creating a side-hustle to finding new clients I would like to share some business tips for photographers, emerging artists and creatives that find themselves in difficulties due to the financial stress.

The first thing you must understand is that you're a business, not just an artist. Realize that getting clients is just part of the game.

Monetize on your talents and experience and be active and get some exposure for the post-lockdown season.

Diversify Your Income

Especially in these difficult times with lockdowns and scarcity of paid work you may have come to the conclusion that you have been relying fully on commercial clients, or agencies or something else and then realize how important it was to have other money streams. Focus more on stock photography, as you can always photograph your own family, yourself, landscapes, and still lifes.

If you’re not sure where to start, spend some time brainstorming potential side-hustles, here are just some ideas

Start your very own photography YouTube channel as a long-term project. Join affiliate programs related to photography. Start a blog, and set up an online shop where I’ll sell photography resources, courses, eBooks, zines, prints.

Become a Specialist

There are many talented photographers out there but they are generalists, but in my experience what consumers want is experts, photographers with a particular insight and mastery of their skills. This year, if you have more free time, use it to build, learn and develop. Pick a niche and get extremely good at it to the point where you can offer the best service.

Build a micro-site dedicated to a niche of the photography world. For example, you could build a site for pet photographers, based on 3 - 5 blogs that you can share on social media.

Network, Network and more Network

It is still possible, without leaving a house, to reach out and network! It helps in to provide a possible customer communication outreach spreadsheet where everything from the name of the person, company name, contact details, outreach date, and any notes can be written down. If you don't hear back, make sure to follow up as it is not uncommon for it to take a few tries before hearing back from a potential customer.

Invite people to join a "Fan Page" and receive a login. In this way, they build their own personal profile page. The Fan Page can be displayed in the back of a session room or studio, where it can be viewed along with the other images that have been uploaded.

Use a referral program. This is an effective tool for indexing a viral spread, as users can share a link via email with friends and family, expanding upon the initial user. However, to make this strategy work you need to offer some incentive for users to refer the link.

Have continuous interaction with your network by starting conversations you care about. In the blog post How I Grew My Wedding Photography Business to $195,000 a Year Using Facebook, Pro Photographer Randy Joyner describes how he did just that.

Use Social Media, from Facebook to Instagram from Linkedin to Twitter!

Full House For Breakfast

Italian Pasta? Yes Homemade!

Homemade pasta or “pasta fatta in casa” is quintessentially bringing you into an Italian house!

There are just a few ingredients for homemade pasta, so it's not difficult, but the trick is to knead it to the correct consistency. Create a mound with your flour and build a well in the middle once you have your ingredients ready. Don't try to mix it all at once when you add your egg mixture or you'll smash the walls of your well and have a huge mess on your hands! The ticket is to mix the flour slowly with a fork until it is no longer runny and can be hand-worked.

Screen Shot 2021-01-30 at 20.28.06.jpg


INGREDIENTS

4 eggs

400gr All purpose flour

1/2 teaspoon olive oil

pinch of salt

semolina flour for dusting


INSTRUCTIONS


Break the eggs

Prepare the flour

Make a well with the flour on a working board.

Pour the eggs into the middle of the well.

Add the oil and salt to the eggs.

With a fork, break up the eggs in the well and slowly start to incorporate the flour into the eggs working from inside of the well to the outside.

Using your hands, form a log with the dough then wash and dry your hands and wrap the log with food-safe plastic wrap. The dough at this point has a ‘rough’ texture and appearance. Let it rest for about 30 minutes.

After resting, remove the dough from the plastic wrap and knead it until it has a nice smooth consistency and texture.

Form the dough into a log (about 2” X 5”).

Cut the dough into ¾” slices and very lightly flour both sides before rolling through the machine. Keep unused dough covered with plastic wrap throughout.

Using a pasta dough machine, start at the setting with the widest distance between the rollers and pass a lightly floured slice of dough through 3 or 4 times until a smooth sheet of dough is reached, (folding the sheet in half each time before rolling).

Next pass the sheet through each of the next numbers on the pasta machine just once, working from the widest to the narrowest setting until the desired thickness is achieved.

Let the finished sheets of dough dry on floured cut pieces of food safe cardboard for about ½ hour.

Then using the cutting attachment, cut your desired type of pasta such as spaghetti or fettuccine.

Gently hold the cut end of the pasta sheet with one hand until it is all cut.

In a long tray, mix equal amounts of all purpose flour and semolina flour (if you do not have semolina flour just use the all purpose flour).

Run the cut pasta through the flour mixture and shake off the excess.

Place the floured noodles on food safe cardboard to let dry.

If storing for future use, once they are completely dried, carefully transfer the noodles to parchment paper and you can make stacks of dried noodles for easier storage.

You can also freeze the kneaded log wrapped in food safe plastic wrap for use at a later date.

To cook fresh noodles, place the desired quantity of noodles in boiling, salted water. It is important to have sufficient amount of water and not overcrowd when cooking the pasta so the noodles do not stick to each other.

The pasta will cook quickly, especially when fresh. Taste noodles to see if to your desired doneness.

Then drain the noodles in a strainer, add your sauce, mix well and top with more sauce if you like.

#italianpasta #pasta #italianfood #foodporn #food #pastalover #italy #cooking #pastalovers #italianfoodporn #homemadepasta #freshpasta #italiancooking #cucinaitaliana #pastaitaliana

Flipboard to drive traffic to your blog

I have been using Flipboard for several years https://flipboard.com/@msecchi, I am the curator of few magazines and storyboards, I do not have many followers but it is for me a great instrument to drive visitors towards my blog and I get amazing results


flipboard.jpg

Everyone insisted that social media, as well as Google, are important for generating customers, so I spent so much of my time and effort in Facebook, Twitter, Pinterest, and SEO or whatever the flavour of the month is today.

But these outlets don't seem to be pushing traffic every time you publish one of your blog posts. It seems to click-through to your site only a small percentage of the following you've created.

There are many ways for bloggers to surface in front of an audience that is interested in the very subject you are writing about, with 34,000 topics searching 21 million magazines compiled from articles on Flipboard as well as around the Internet.

The more content you share, the more traffic to your site. The more followers you acquire, the more influence you have on the content created by others in your community. With so many ways to discover new people and content in a community of millions of users worldwide, Flipboard is smart social news service that gets better with time.

By creating your own magazine, you can syndicate your content and ensure that it is seen in a variety of topic feeds. Why? Because we use likes, shares, and views as a signal that this content is likely to be good. The more correlations a topic has, the more likely the topic will be surfaced.

It's also important that your magazine has strong headlines and organisation. The greater the quantity of metadata we contain with your article, the more likely it is that our topic engine will find it.

Flipboard 1.jpg

The next step is for the magazine to accumulate a serious readership. To do this follow Flipboard instructions!


Promoting your magazine on social networks like Facebook, Twitter and Pinterest.

Inviting co-contributors—since each co-contributor adds his/her readership and network to the mix.

Creating an engaging profile so people follow you and learn about all your magazines. This amplifies the network effect.

Adding a short comment when you flip. Not only does this add value to your curation, but it also draws attention to your post since comments are emphasized in our layouts on phones.

Building reciprocal relationships with other MagMakers:

a) find magazines to follow and perform social actions, such as re-flips, likes and comments. This will appear in other people’s notification streams, so they will check you out and hopefully follow you back.

b) follow topics and then you will see related magazine recommendations in your Cover Stories—which then makes it easier to do a) above and repeat the virtuous cycle.

and I will also personally add

  • Check your analytics regularly.

  • Make additional magazines.

  • Be a consistent flipper.


Are you ready?? GO TO FLIPBOARD

Italian Crostata or Jam Tart

Crostata is a traditional Italian jam tart made with shortcrust pastry and an fruit filling, it’s super easy to make and tastes delicious! Serve your crostata for breakfast with a cappuccino or for dessert!

This rustic jam tart is super popular and is eaten all over Italy for breakfast, as a snack or a dessert.


The ingredients for the pastry dough

flour type 00 (or unbleached all-purpose or cake flour)

eggs, organic free-range, at room temperature

butter, cold

sugar (granulated or cane sugar)

lemon zest, from an organic lemon

baking powder (just a teaspoon), it makes the pastry a little softer, still crumbly but less “short”


crostata.jpg

Making the dough – step 1

Firstly, on a work surface place the flour making a hole in the middle and add the sugar, the cubed butter, eggs, lemon zest, and baking powder.

Secondly, mix the ingredients quickly with a fork (or a bench scraper).

Thirdly, start working the dough with your fingertips.

Fourthly, knead it lightly but do not overwork so as not to warm up the butter too much.

As shown above, work it just until it binds together, then shape it into a ball.

Lastly wrap the dough ball in plastic wrap and place in the fridge for at least half an hour.


Rolling the dough – step 2

After the resting time in the fridge, take out and set aside about a quarter of the dough for the lattice. On a floured board and with a floured rolling pin, start rolling out the dough. You could also roll it in between two sheets of parchment paper.

Roll it to about 4 mm thickness.

Next, place the rolled dough into a tart pan, pressing the bottom and up the sides, patching any holes that might occur, and trimming the excess dough on the top edge (add it to the dough that you have already set aside).

Now, prick the bottom of the pastry with a fork.


Assembling the crostata – step 3

Afterwards, spread the jam evenly on the surface. You can use any type of jam, I used homemade blackberry jam.

Then, with a pastry cutter (or a ravioli cutter with a zig-zag wheel), cut 1/4 inch strips of pastry.

Using a spatula to lift the strips, start placing them cross wide on the jam, forming a diamond lattice pattern.

Re-roll the scraps of dough and cut more strips to cover the surface of the crostata, then, with a fork, seal the edges of the pastry (you can also use leftover pastry to make a nice border all around).

Finally, bake the jam crostata in the preheated oven (180°C/350°F) for about 35 minutes.


The taste test

The crostata is crispy on the outside, tender and crumbly on the inside. The jam inside is well-balanced with a lovely buttery flavour and a citrus undertone. It’s not too sweet, but it is extremely delicious. The crostata is good for both adults and children. It can be eaten as a dessert, a snack, or even for breakfast! Yes, there really is jam inside.

Enjoy!

Improve your Long Exposures Photography

Long exposure photography is a technique where you allow your camera’s sensor to gather light for a longer period of time. One major goal of this is revealing more detail in the darker areas of the scene. For more creative purposes, you may want to use a long exposure to create a sense of motion in your images.

Venice with Long Exposure

Venice with Long Exposure

Filters

When you want to use a long exposure to produce a creative effect such as blurry water but there is too much light to allow a slow shutter speed, it’s possible to increase the exposure time by using filters. Neutral density filters are solid “grey” looking filters of uniform density that have no effect on how colours are recorded but are used to reduce the amount of light entering the camera. They can be either circular screw-on type or square

Create a visual Composition and Calculate your exposure

Depending on the tones in your scene, many cameras can calculate a good long exposure up to 30 seconds. But if you’re doing an exposure that’s longer than 30 seconds, or you’re adding any ND filters, you must calculate the settings for your exposure.

Cable Release

The shutter button on your camera releases the mechanical shutter inside of the camera. Using a shutter release button allows you to capture images without touching the camera at all. A shutter is a curtain that lets light into the camera sensor for a period of time; using a wired or wireless shutter release, you can initiate the opening and closing of this curtain without touching your camera.

Tripod

Although it’s one of the most important elements of any photo set up, it’s also one of the most undervalued, ignored, and overlooked. A good tripod will cost you money, while a cheap one may not even do its job. However, the downside is that some people won’t buy a new tripod because they think that they don’t need a sturdy one yet.

My favourite brand is Manfrotto I have been using then for so long I cannot even remember, One of the latest ones I have been using is the Manfrotto BrFree 3-Way Live Advanced. I will review on another post in the next few days. You can find it here

Manfrotto Befree Tripod

Manfrotto Befree Tripod


Set your camera on manual or bulb mode

Many DSLRs have multiple pre-programmed modes that can set your shutter speed and aperture for you. But these modes will also be automatically metering for you, which is unlikely to get you the results you’re looking for. So instead opt for Manual mode, or Bulb mode if you will be doing an exposure of over 30 seconds. When using Bulb mode the shutter will stay open from when you press the shutter release button, to when you let go.

Shoot at the lowest ISO possible

Although newer cameras can shoot with relatively little noise at higher ISOs, long exposures can create noise. So shoot with the lowest ISO possible on your camera. Most cameras come with long exposure noise reduction features, but at higher ISOs using this feature can make the noise worse.

Cover your viewfinder to prevent light leaks

Although light leaks rarely occur with regular exposures, with longer exposures the images are subject to light leaks through the viewfinder. Even a small leak can create big issues like hazes on an image with a long exposure. Don’t cover the viewfinder with your thumb, as this can create camera movement. Instead, try covering it with gaffers’ tape or a custom viewfinder cap and compose your image in your camera’s live view.

Shoot in RAW

Shooting long exposures can be tough, especially the first few times. Shooting in RAW will give you more latitude to recover a slightly overexposed image and will give you greater control in your post-production.

Foggy Day in Venice - Long Exposure

Foggy Day in Venice - Long Exposure


Improve your Instagram SEO

Here are some essential best practices for optimizing your Instagram profile and posts to help you boost discoverability and engagement!


  1. Include if you can your primary keyword in your display name and @Username. ...

  2. Use your secondary keywords in the bio.

  3. Treat your hashtags as keywords.

  4. Use secondary keywords in your image captions.

  5. Take advantage of Instagram alt text. ...

  6. Track everything with analytics.


Today I would like to point the Instagram Alt text

Instagram alt text is a new-ish feature that allows you to write custom alternative text so you can add a richer description of your photos.

And while the feature was mainly designed for Instagram users who have visual impairments, it can also be used for SEO.

At the moment, Instagram creates automatic alternative text so you can hear descriptions of photos through your screen reader.

The feature uses object recognition technology to generate a description of photos for screen readers so you can hear a list of items that photos may contain as you browse the app.

But you can also create custom alternative text when you upload a photo to create a clearer description of what your post is about! Here’s how to do it:

To see and edit alt text for a photo before you post it on Instagram, tap Advanced Settings at the bottom of the screen before posting. Next, tap Write Alt Text.

instagram-alt-text-how-to-step-2-400@2x.png

Here are 8 tips on how to write ALT text:

  1. Describe the image as specifically as you can.

  2. “Imagine someone is sitting next to you as you scroll through Instagram and they point at a photo and ask what it is. Chances are, you’ll give them a one or two sentence description that is perfect for writing as alt text”

  3. Make sure you focus on what you want people to remember about your image.

  4. Is there an important text on your photo (like a signage or quote)? Write out the text.

  5. Keep it (relatively) short.

  6. Write who is on the picture (especially if you have a personal account). For example: Alex and Andrew smiling and sitting on the sofa.

  7. Colors: As Perkins School said, “don’t be afraid to share what colors are in a photo, if color is important. However, don’t get caught up trying to explain what color is to someone who can’t see it. A photo can be described as being in black-and-white, having warm or cool colors, or being tinted a certain color. Someone wearing clothes that are the main focus of the photo can write that they are wearing a black and white lace dress with yellow earrings.”

  8. Use keywords (for example, if you are a travel blogger, use the keyword “travel blogger” in your alt text to increase your chances to reach people who love following travel bloggers).


Pasta al pesto

Pasta with basil, pine nut and cheese sauce.

Ideally, to make perfect pesto you need basil from Pra’ (a Pdo product), a district of Genoa, the delicate extra-virgin olive oil from the Ligurian Riviera and garlic from Vessalico (Imperia), which is milder and easier to digest. The mortar and pestle are fundamental.


Especially if you live abroad that is not so easy….so this is our shortcut

For the Pasta it is impossible to find fresh Trofie…so we use dry Trofie or Spaghetti or Linguine or Farfalle / Fusilli /Penne

For the Pesto if you do now want to do your own….but is quite easy…..you can buy a premade, we use Tigullio or Star and Liddle has a very nice one too (Baresa or Italiano) the original is green pesto!

Pasta al pesto traditional recipe

Ingredients for 4 servings

Time 30 mins

350 g fresh trofie
40 g grated grana cheese
30 g grated pecorino sardo cheese
15 g pine nuts 
30 basil leaves
garlic 
extra-virgin olive oil 
cooking salt

Trofie al pesto: how to

Wash and dry the basil leaves. With a mortar and pestle crush some of the leaves, gradually adding more (makes it easier to crush them).

Add the pine nuts a little at a time, then slices of garlic and a pinch of cooking salt. Mash the ingredients until smooth.


Add the cheeses and mix well.

Drizzle 40 g of oil into it as you crush until homogeneous and compact. Cook the pasta in plenty of salted water. Dilute the pesto with a bit of the cooking water to make it creamier, then drain
the pasta and add the sauce. Garnish with some whole basil leaves and freshly grated cheese.