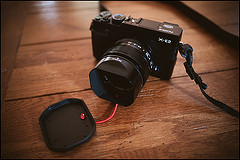
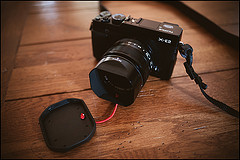
Fuji X100s for street photography

I am often asked what settings I use for street photography. First, let’s make sure you have everything you will need, extra batteries and extra memory cards. A fast memory card is essential when shooting raw. ...do not forget your camera! (Marco Secchi)

Here are my settings for street shooting: Auto ISO: 200-3200 Min. Shutter speed limit: 1/125 Focus AF-C mode Drive Mode S or C: most of the time I am in s mode, c-mode if the situation really calls for it. While in AF-C mode , always awake/never sleep doesn’t work, keep half pressing the shutter from time to time, especially when you spot a potential shot, make sure the camera is not asleep Shutter priority at 1/250 or higher in regular light Optical Hybrid finder vs EVF: depending on the scene, if it is a context or overview shot, OHVF works, however, I found the EVF preferable for precise positioning of the af point since there is no time to reframe/refocus. Develop a solid grip on your camera, experiment, strap around the neck or wrist strap. Learn to change +- dial with out looking at your camera, the same goes for shutter speed, keep your eyes on the street.

Use your x100s a lot, that’s it!

Fuji X Custom Settings

Today arrived the new firmware for most of the Fuji X series cameras.  When you update all the custom settings are wiped out as well as cache memory and frame numberHere are more or less my latest  custom settings.

Name ISO Dynamic Range Film Simulation White Balance Colour Sharpness Highlight  Shadow  Noise 
Standard AUTO DR100 Provia (standard) Auto 0 0 0 0 0
Landscape Normal 200 DR100 Astia (soft) Auto -1 +1 -1 -2 0
Landscape  High Contrast 400 DR200 Astia (soft) Auto -1 +1 -1 -2 0
Portrait Neutral 200 DR100 Pro-Neg Standard Auto 0 0 0 0 0
Portrait Neutral Higher Contrast 400 DR200 Pro-Neg High Auto 0 +1 -1 -2 0
B&W Landscape 800 DR100 Mono+Red Auto 0 +1 0 0 0
B&W Portrait 800 DR100 Mono+Green Auto 0 +1 -1 -1 0


I have set them according to the subjects I tend to shot so I can change a whole group of settings with a push of the "Q" menu button and a quick turn of the dial.   Finer tweaks to color and highlight/shadow tone were done from experience of using the camera and the above are what I  eventually arrived at after some months of use.

I tend to play quite a bit with Highlight Tome, Sharpness and Shadow Tone so I change them often. For the ISO thee are times when I like to have in AUTO with Standard 200, Max 3200 and min shutter speed at Focal length I am using x1.8

While I like the more saturated colors and higher contrast in Astia (soft) for landscape generally, I found it tended to clip into the shadows too easily so I somewhat reduced the contrast there by making a -2 adjustment.

For portraits the Provia (standard) or Pro-Neg film simulations work well as they are rather neutral and subdued in colour, so render skin tones well.  The Pro-Neg Hi gives the same colours but more contrast.  I reduced the contrast at the shadow end as I found it was clipping to black too readily.

The dynamic range settings work really well and allow the camera to record more detail in highlights and shadows than in a normal exposure.  For the higher DR setting (DR200 is all I have needed) the camera needs to be set to ISO 400 but the sensor/processor is so effective that there is no discernible noise penalty.  It isn't an HDR feature....my understanding is that it works like many other similar features and the camera basically underexposes the image then processes in an exposure and tone curve that avoids clipping at each end.

The Jpeg output is so good on this camera that I shoot Jpeg almost all the time, whereas I only shoot RAW on my Nikon DSLRs.  Images from the X-E1 print superbly and have amazing pixel level sharpness.  The camera seems to resolve beyond what its 16MP sensor should, probably due to the absence of the anti aliasing filter.  Strangely, when 100% images are viewed on a computer monitor, detail can look somewhat mushy due to the unusual colour filter layout of the X-Trans sensor, but images view nicely at normal sizes and print in a very natural way, giving what I would describe as an organic look to textures that look real enough to touch and bitingly sharp.


My Fuji X Series Cameras & Lenses

little fujiMy fav. at present is The Fujifilm XT1After starting at the top-end with its X-Pro1, Fujifilm has been steadily expanding its X-series mirrorless camera to appeal to a broader audience. With its X-T1, Fujifilm has moved back towards the high-end, offering a fully-loaded mirrorless camera in a weather-resistant, SLR-style body. There's plenty more where that came from - the X-T1 has one of the largest EVFs we've ever seen, numerous manual control dials and, for the first time on an X-series camera, an optional battery grip.

The 'guts' of the X-T1 are very much like those found on the recent X-E2. This includes the 16 megapixel X-Trans CMOS II sensor (with on-chip phase detection), EXR Processor II, built-in Wi-Fi, and full HD video recording. The main differences between the X-T1 and X-E2 are the LCD (tilting vs fixed) and EVF (in terms of magnification), the maximum burst rate (8 vs 7 fps, now with focus tracking at full speed), a flash sync port and, of course, the design.

The Fuji X series walk-around cameras that can be adapted for wedding work, editorial work heck, even commercial work.

With these cameras I feel unstoppable. Invincible. I no longer need to carry  heavy bulky DSLR around all day – with these cameras I am able to carry an entire kit in a shoulder bag and never tire. With these cameras I rarely miss a photo because I have always have a camera with me.

With these cameras I am stealthy, quick, unobtrusive, silent, a rocket for recording the extraordinary in the mundane of the everyday. My photography changed!

The Fujifilm X-Series range of digital cameras consists of the company Fujifilm's high-end digital cameras and is aimed professional and keen enthusiast photographers. It is part of the larger range of Fujifilm's digital cameras. X-Series itself is not unified by a common sensor size, technology or a lens format. Its main differentiating feature is the emphases on the controls needed by an advanced digital camera user.

I have owned or own at present the following Cameras

  • Fujifilm X100: prime lens digital camera that uses a custom APS-C sized CMOS sensor and Hybrid Viewfinder, and fixed 23mm F2.0 Fujinon lens. Announced at Photokina, September 20, 2010, the X100 launched globally in March 2011. Succeeded by Fujifilm X100S. SOLD
  • Fujifilm X10: advanced compact featuring a 2/3-inch 12-megapixel EXR-CMOS sensor and a high-definition F2.0 wide-angle and F2.8 telephoto Fujinon 4x manual zoom lens (28-112mm). Announced September 1, 2011. Succeeded by Fujifilm X20 SOLD
  • Fujifilm X-Pro1: Mirrorless interchangeable-lens camera that uses the "X-Trans CMOS" sensor and the Fujifilm XF-mount system of lenses. It was announced in January 10, 2012, and launched in March 2012. SOLD
  • Fujifilm X-E1: Mirrorless interchangeable-lens camera which is a slimmed-down version of X-Pro1. The modifications include removal of expensive hybrid finder replaced by an upgraded electronic viewfinder. New EVF uses a 2.36M dot OLED unit, out-speccing the X-Pro1's 1.44M dot LCD finder. It was announced on September 6, 2012. SOLD
  • Fujifilm X20: is an the replacement of X10 enthusiast compact camera featuring 2/3-inch X-Trans CMOS II sensor, EXR Processor II and a new advanced optical viewfinder. It was announced onn January 7, 2013.
  • Fujifilm X100S: a redesigned version of the X100 with new sensor-based phase detection, same sensor as Fujifilm X-E2. It was announced January 7, 2013. SOLD
  • Fujifilm X-E2: successor to the X-E1, featuring X-Trans CMOS II sensor, larger (3") screen with higher resolution (1.04 M), Digital Split Image technology, Wi-Fi. Announced on October 18, 2013.
  • 2 Fujifilm XT1 a new camera with a weather-sealed body featuring X-Trans CMOS II sensor and tilting LCD screen. It was announced on January 27, 2014. Also the first X-series camera with an optional battery grip, and the first camera from any manufacturer to fully support UHS-II SD cards.

I have the following Lenses

  • Fujinon XF18mm F2 R18mm focal length (27mm equivalent) F2.0-F16 aperture SOLD
  • Fujinon XF35mm F1.4 R35mm focal length (53mm equivalent) F1.4-F16 aperture
  • Fujinon XF60mm F2.4 R Macro 60mm focal length (91mm equivalent) F2.4-F22 aperture SOLD
  • Fujinon XF18-55mm F2.8-4 R LM OIS 18-55mm focal length (27-83mm equivalent) (F2.8-F4)-F22 aperture
  • Fujinon XF14mm F2.8 R14mm focal length (21mm equivalent) F2.8-F22 apertureSOLD
  • Fujinon XF55-200mm F3.5-4.8 R OIS55-200mm focal length (83-300mm equivalent)
  • Fujinon XF23mm F2.0 R 23mm focal length (35mm equivalent) F2.8-F22 aperture
  • Fujinon XF27mm F2.8 R 23mm focal length (41mm equivalent) F2.8-F22 aperture
  • Fujinon XF 50-140mm f/2.8 R LM OIS WR: A weather-resistant fast telephoto zoom with image stabilization, covering focal lengths equivalent to 75–210mm on full-frame. Officially announced on September 10, 2014.
  • Fujinon XF 18-135mm f/3.5–5.6 R LM OIS WR: A weather-resistant, image-stabilized superzoom, covering focal lengths equivalent to 27–202.5mm on full-frame. Officially announced on June 16, 2014.
  • Fujinon XF 16-55mm f/2.8 R LM WR: An enthusiast-level standard zoom, covering focal lengths equivalent to 24–82.5mm on full-frame, featuring weather-resistant construction. This lens was originally expected to be available in mid-2014, but has been delayed. Officially announced on January 6, 2015 during CES 2015.

Weston Master III Lightmeter

Over many years, professional photographers the world over have user Weston exposure meters. Why? Because they fulfill the professional's needs. Extremely accurate in all lighting situations, rugged, generally no reliance on batteries. IMG_1650

The epitome of the selenium cell meter is the Weston Master, which has a long and complicated history, not least because there were both US-built and UK-built versions: the UK company started as a subsidiary of the US-based company (which was founded by an Englishman) and became 51% UK owned (as Sangamo Weston) in 1936.

The Weston Master Universal was introduced in 1939 and remained in production in the UK until about 1950, though the Weston Master II was introduced in the United States in 1945/6. The Weston Master III appeared in 1956; the Weston Master IV in 1965; the Weston Master V in 1967; and the Euro-Master in 1970. Even after Weston lost interest, the Euro-Master was manufactured by Kilbride Instruments in Scotland from 1980 to 84 and then as the Euro-Master II by Megatron in London from 1984 to 2010.

It works as follows: moving the small tab that sticks out from the silver dial adjusts the film speed setting which can be read though the small opening in the red dial. Then take a reading by aiming the meter cell on the bottom of the meter at the subject. If the light levels are high, leave the perforated cover over the selenium cell in place; if the the light is dim, then open the perforated cover. The meter needle will point to a number on the meter scale. The range of numbers for bright light is 25 to 1600 and for low light it goes from .2 to 50. Use the turned up tabs on the black wheel to aim the large silver arrow at the corresonding number on the outermost part of the dial. You can then read all the correct exposure combinations off the silver (shutter speeds) and black (f stops) dials. In other words, a shutter speed that lines up with an adjacent f stop should provide the right exposure.

Manual is here

Portrait Photography with Fuji XE-2

little fuji This is my standard portrait set up and I use aperture priority in conjunction with auto ISO.

Here are my settings:

ISO set to 200 Auto on ~ max 3200 with a minimum shutter speed set for each lens as follows: 14mm ~ 1/40th second, 23mm ~ 1/100th second, 35mm ~ 1/160th second Shutter speed dial set to A Aperture dial set to f/1.4 – f/4 as required Jpeg Fine + Raw Auto WB Ns film simulation, occasionally Astia Soft

AF set to S Activated on a half press of the shutter. I then move the focus zone around the frame as needed. I set the focus zone as the smallest square available as any background detail within the square during focusing might cause the lens to back focus.

With these settings dialed in I just pick up the camera, switch it on and start shooting. I adjust the shooting the exposure compensation as required via the very convenient dial, I change the focus zone to the best position for each shot and I reset the minimum shutter speed for Auto ISO in the ISO menu (Fn button) if I change my lens.

With the AF set to activate on a half shutter press I have to focus before every exposure. I rarely shoot multiple frames the same so I really don’t mind doing this.

I set the aperture and let the camera adjust the ISO from 200 to 3200 to suit the light level. When it runs out of ISO range it alters the shutter speed. I came to the values of minimum shutter speed using my simple formula* (See the section on shutter speed below). Occasionally I’ll dial in a higher shutter speed, especially when using the 14mm lens if the subject movement demands it. I just set the shutter speed dial to the value I want and the auto ISO continues to perform just as before.

Fujifilm X100S settings for Black & White

With the X100S I shoot with ISO set to Auto, with a base ISO of 200 and a maximum of 3200. Digital noise really isn’t an issue even this high. Trust me. And the shutter speed limit is mostly set to 1/125 of a second, unless I shoot to get some deliberate motion blur, then I find 1/30 sec is perfect. That gives me some motion and energy that can lift a picture to even greater heights. Well enough about that. I promised you my settings, and these are the settings I have come to love by simply shooting, testing, looking, evaluating and readjusting, over and over again for a couple of months. These settings give me pictures with good contrasts and some punch. And I love punchy b&w!
DSCF9507 copy
So the settings for my custom setting C2 for capturing in both RAW and black & white JPGs are as follows:
Image size: L 3:2
Image quality: F+RAW
Dynamic range: DR100
Film simulation: BR (monochrome + R filter)
Sharpness: +1
Highlight tone: +2
Shadow tone: +2
Noise reduction: 0

Leica M6

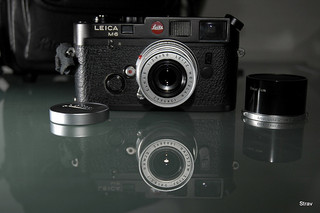
The Leica M6 is a rangefinder camera manufactured byLeica from 1984 to 1998.

Leica M6 Wetzlar, Elmar 50, ITOOY

The M6 combines the silhouette of the Leica M3 with a modern, off-the-shutter light meter with no moving parts and LED arrows in the viewfinder. Informally referred to as the M6 "Classic" to distinguish it from the "M6 TTL" models, and to indicate its "Classic" M3 dimensions. The top and bottom plates were made from lighter, cheaper magnesium alloy rather than the heavier machined brass of the M3. The M6 and M6 TTL are mechanical cameras; all functions save the light meter work without batteries, unlike the succeeding M7, which needs electrical power to operate properly.


My Recommended Menu Settings Fuji X pro 1

My Recommended Menu Settings

These are the camera settings I changed to made the Fuji X-Pro1 most suitable for my shooting needs. Your mileage may vary, but I found these tweaks to make the camera all the more usable than the stock camera settings:

Shooting Menu 1: Image Quality (RAW+FINE) – Always shoot in RAW. With RAW + FINE, you get the flexibility of RAW with the instant use of the X-Pro1?s excellent JPGs. Also a smart move until Adobe fixes issues with their demosaicing algorithm for the X-Pro1.

Shooting Menu 3: Fn Button (ISO) – Quick access to change the ISO from the Fn button. With this access, which I find faster than the Q button for dedicated ISO adjustment, you have all exposure settings at your fingertips.

Shooting Menu 4: AE/AF-Lock Mode (Switch) – Ability to switch AE-AF-Lock on by pressing button once instead of having to press and hold – a useful tweak if you focus and recompose often instead of changing the AF point.

Shooting Menu 4: AE/AF-Lock Button (AE+AF) – Locks both AE and AF.

Setup 1: Silent Mode (ON) – No AF confirmation noise or beeps from menu selections for quieter operation.

Setup 2: Quick Start Mode (ON) – Doesn’t completely power off camera to increase responsiveness.

Setup 2: Image Display (OFF) – Turns off default 1.5 second image review in EVF for smoother shooting experience. 

Setup 3: Color Space (sRGB) – My preferred color space.

“AF-ON” Button

With my DSLRs, I often have my cameras set up so that the shutter release only fires the shutter, while AF is controlled by the AF-ON button only. This way it’s so much faster shoot for my style of photography, and many other shooters prefer this set up as well.

While the Fuji X-Pro1 doesn’t really have a dedicated AF-ON button like most DSLRs, there is a work-around that you can use to achieve the exact same set up.

The small trick is to shoot in manual focus mode. The camera now defaults to allow the AE-L/AF-L button to activate focus as a kind of “AF override.” Now, the shutter release is entirely de-coupled from AF, but you can still activate AF through the AE-L/AF-L button, so in effect you’ve got your AF-ON button back.

AF Trick: Focus & Fire In One Action

One trick that many users seem to be finding out is to press the shutter release down fully to achieve focus and release the shutter in a single act. Most DSLR users are used to acquiring focus with a half-press and then firing the shutter after focus is locked. With the Fuji X-Pro1, the focusing lag experienced is partially due to the separation of these steps.

Many users are finding that by fully pressing the shutter release in one motion, the delay involving the contrast detection AF and shutter release seems to be lessened.

This trick is basically the opposite of the preceding trick to completely separate focus and shutter release, but if you’re a DSLR user who has been frustrated by the focus speed, it’s worth breaking your habits to see if this works for you. While this trick doesn’t work for all types of shooting, try it – you might just like it.

Never Shoot in 6FPS Bust Mode. Ever.

6FPS sounds great, until you realize that shooting in bursts will lock up your camera for what feels like 10x the time it took you to shoot your sequence. Just stick to single shot mode, your patience will thank you for it.
 

My Fuji Travel Kit

Over the last few weeks I have received a number of emails asking which camera bag I use with the Fujifilm X-Pro1 and also what equipment I include in my travel photography kit bag. I thought I would create a simple list of what I include in my travel photography kit regardless of the size of the trip. (Marco Secchi)


Cameras

Obviously I travel with the Fujifilm X-Pro1 camera and I carry with me the Fujinon 35mm and Fujinon 18mm lenses. In addition I also bring along the trusty Fujifilm X100. Occasionally I have the X10 in my pockets as well

The X100 is slightly smaller so tends to be carried around literally everywhere and it is perfect for those times when you are not photography focused but want quality photos if the opportunity arises.

I use one of my own brand  strap and Italian leather half case on the X-Pro1 to protect my camera

On the X100 I use again one of my own straps. They can be on the right or left side of the camera depending on your preference. A  leather ring  reduce the strap opening. The strap comes with a 1/2? split ring to attach to the camera.

Camera Bag

I use either the Think Tank Retrospective 5 Pinestone Shoulder Bag  or one of my own leather bags. Both bags come  with 3 divided sections ideal for the X-Pro1, X100 and a 2nd lens.

There are a number of additional pockets for ipad, documents memory cards etc

Tripod

For traveling light I always take my brilliant little GorillaPod

Accessories

I do not carry many carry accessories with me. Just a  lens cleaning cloth  a Hamma cable release for long exposures over 30 seconds, couple of spare batteries, connections to my ipad, iphone

I also pack a couple of soft release buttons, many argue these are vanity decoration but I do think they make the button easier to use. I use mine either in glass or  wood

I carry most of the time  the Fuji flash EF x20.


On the trail of Tintoretto

An exhibition honouring 16th-century Venetian master Tintoretto opens in Rome today Saturday, following the painter's career from his days as an ambitious disciple of Titian to a bitter old age. "Tintoretto was the most controversial painter of his time," Melania Mazzucco, one of the organisers, told reporters in the Italian capital.  Tintoretto, whose real name was Jacopo Robusti, owed his nickname to his father who was a manufacturer of dyes ("tinta" in Italian). He became one of the greatest practitioners of the Venetian style.Images from Venice  - Fotografie di Venezia...***Agreed Fee's Apply To All Image Use***.Marco Secchi /Xianpix.tel +44 (0)207 1939846.tel +39 02 400 47313. e-mail sales@xianpix.com.www.marcosecchi.com (Marco Secchi)

Tintoretto used to live meters away from Campo Dei Mori where he used to walk probably every day

The exhibition, which runs until June 10, begins with one of his monumental works "The Miracle of the Slave" (1548), measuring 4.16 metres by 5.44 metres (14 feet by 18 feet) and normally jealously guarded in Venice. The choice of putting a slave at the centre of the painting instead of the saint who is rescuing him was considered scandalous at the time.Another masterpiece in the show is "The Theft of the Body of Saint Mark" (1564) showing a group of Christians in Alexandria taking away the saint's body from a bonfire that has been miraculously extinguished by rain. Apart from religious and mythological subjects, Tintoretto also painted hundreds of portraits -- a source of revenue from aristocrats, writers and celebrities that he used for contacts and protection. Tintoretto's pride was legendary: he once turned down a knighthood from French king Henry III because he did not want to kneel down and he refused to allow his beloved daughter Marietta to leave his home. His final years were cruel to the painter. Marietta died in 1590, followed by his son Giovanni Battista. His last self-portrait shows a somber and humbled Tintoretto, his face marked by the harshness of life. His last child died in a convent in 1652, leaving him without descendants.

Artist's block..oh no!

I’ve had artist’s block that is for sure.

I don’t know whether my lovely muse has gone on strike, or possibly a mix of  stress and lack of confidence, but I haven’t taken a picture since a couple of  weeks.

Not only that but I really do not want even to take out my camera.

This has happened to me before so I do not worry too much and I know what I have to do. 

First, do absolutely nothing, and avoid to get stressed.  I know will come back.

Second, sometimes we all need a break.

Third, I go and look at paintings in galleries. I don’t know anything about art but I  love it.  If creativity is a reservoir, it definitely helps fill it up again.

Fourthly, I go for walks with my iPod. The sea helps too, but there is no sea in Milan!

And finally, I read lots .

And then out of the blue, I woke up this morning and was happy to take pictures again!